In today’s competitive environment, industrial manufacturers continue to invest heavily in tests aiming to improve metal coating performances.
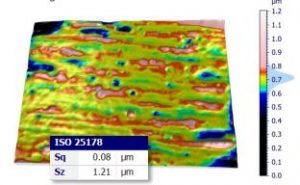
In this case study, scratches on a copper surface with tin deposits were measured by a 3D optical profiler.
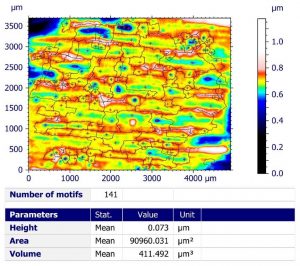
The roughness surface was obtained by applying filtering techniques. The surface was then partitioned into motifs with ridge lines bounding pits indicated by the + symbol. Morphological parameters and statistics on scratches obtained allowed greater understanding of scratch phenomena.
Mountains® tools used
-
Advanced filtering techniques
MountainsMap® operaters were applied to obtain the roughness surface allowing calculation of ISO 25178 Sq and Sz height parameters.

-
Motifs analysis
The surface was partitioned into motifs with ridge lines bounding pits indicated by the + symbol. Motifs parameters were calculated.

Instrument & software used
3D optical profilometer + MountainsMap® software