If there’s one thing we are committed to at Digital Surf HQ, it’s replying to your questions and feedback! We are always eager to hear about your favorite Mountains® software features, as well as any issues you are having trouble with. In this article, our direct sales manager Anne Berger shares her answer to a question she is asked frequently: how can I apply color to complex objects in scanning electron microscopy images?
Thanks to automatic object recognition, colorizing SEM images using Mountains® really is a straightforward exercise and will save you hours compared to performing the same operation with photo editing software. Sometimes, however, objects in images are quite complex and you may not be getting the best results using the default segmentation settings.
So, how do I get more selective granularity?
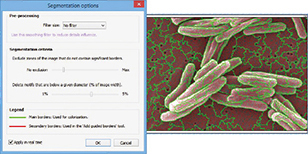
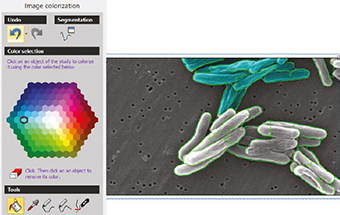
The image below of tuberculosis bacteria illustrates this problem. The default settings applied by the Colorization tool produce too many “fragments”. Borders within the image must be redefined in order to isolate the main objects.

By applying the following steps, you will be able to easily deal with this.
1- In the Colorization Study, click on the Segmentation button
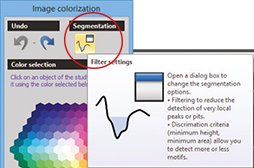
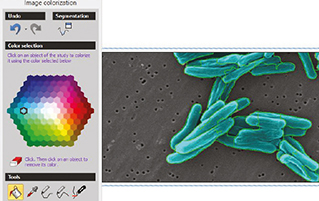
2- A dialog box appears and the main borders are shown
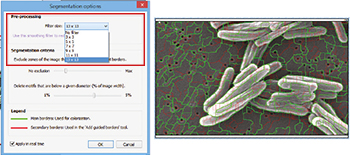
3- There are several different options to play with here
Filter size – this amends borders (a high value reduces the number of individual objects)
Exclusion – this excludes non-significant borders
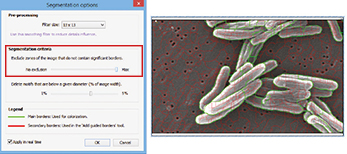
Motifs – this deletes smaller motifs

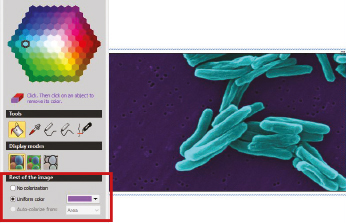
4- Then, you can begin to colorize each motif with the paint bucket tool. Because you now have fewer motifs, this should not take too long.
Feel free to zoom right in on motifs to add color. You may need to fine-tune some of the borders with the Add and Cut tools (Colorization window).
5- Finally, when this is done, choose the color you want for the background (rest of the image).
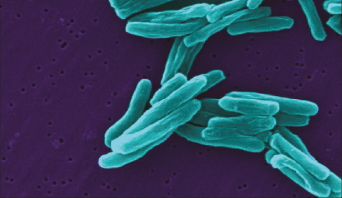
6- Now admire the result!
Make sure you select the Image only display mode to better visualize your image.
See advanced SEM image colorization in action: watch this video (and many more) on our video tutorial page:
Author : Anne Berger